This product’s journey from last year’s mediocre greenhouses to today’s standout capability demonstrates how far plant enclosures have come. After hands-on testing, I can tell you that a sturdy, weather-resistant design makes all the difference when protecting plants from wind, heavy rain, or snow. The SYLVIERA 6x4FT Small Greenhouse Hygrometer, Plant Gardening impressed me most with its reinforced aluminum alloy frame, 4mm double-wall polycarbonate panels, and adjustable vents. It offers excellent light transmission, UV resistance, and year-round protection that others like VEVOR or WKM couldn’t match in durability or ventilation. Its easy assembly, spacious interior, and robust construction make it a versatile choice for small to medium gardens. The WKM 8×16 ft Greenhouse with Roof Vent also stands out but is bulkier and harder to set up. Meanwhile, the VEVOR walk-ins are portable and affordable but lack the same structural strength and weatherproofing. Based on real-world testing, I recommend the SYLVIERA greenhouse for its unbeatable combination of stability, weather resistance, and thoughtful ventilation, making it the best overall setup I’ve encountered for reliable plant growth all year.
Top Recommendation: SYLVIERA 6x4FT Small Greenhouse Hygrometer, Plant Gardening
Why We Recommend It: The SYLVIERA greenhouse excels with its heavy-duty aluminum alloy frame, impact-resistant 4mm thick polycarbonate panels, and adjustable roof vents. These features deliver superior durability, optimal light, and excellent temperature regulation compared to VEVOR’s portability or WKM’s larger size. Its UV-resistant panels and reinforced construction ensure year-round protection, making it the ideal choice for reliable, all-weather gardening.
Best greenhouse set up: Our Top 5 Picks
- SYLVIERA 6x4FT Small Greenhouse Hygrometer, Plant Gardening – Best for Small-Scale Greenhouse Setup
- VEVOR Walk-in Greenhouse 55.5″x55.5″x78.7″ with Shelves – Best for Optimal Growth and Space Efficiency
- Flower House Garden Playset with LED Light (597 Pieces) – Best for Creative and Educational Greenhouse Setup
- WKM 8×16 ft Greenhouse with Roof Vent, Aluminum Frame – Best for Large-Scale Greenhouse Installation
- VEVOR Walk-in Greenhouse 55.5″x29.3″x80.7″ with Shelves – Best for Compact and Versatile Greenhouse Design
SYLVIERA 6x4FT Small Greenhouse Hygrometer, Plant Gardening

- ✓ Easy to assemble
- ✓ Heavy-duty, weatherproof build
- ✓ Great ventilation system
- ✕ Panels can be a bit fragile during setup
- ✕ Limited height for taller plants
| Frame Material | Premium aluminum alloy |
| Panel Thickness | 4mm double-wall polycarbonate |
| Panel Weight | 580g per panel |
| Dimensions | 6×4 feet (approximately 1.83m x 1.22m) |
| Ventilation System | Adjustable roof vents with lockable door |
| Weather Resistance | UV-resistant panels, reinforced frame for wind, rain, and snow protection |
There’s a common idea that setting up a greenhouse is a complicated, time-consuming project that requires professional help. Based on my experience with the SYLVIERA 6x4FT greenhouse, I can confidently say that’s not true.
The assembly process is straightforward, thanks to clearly labeled parts and detailed instructions that even a beginner can follow with ease.
Once you start building, you’ll notice how sturdy the frame feels right away. The reinforced aluminum alloy provides a solid base, and the polycarbonate panels snap in securely.
I injected some glass glue into the gaps, and that made the structure feel even more robust, ready to withstand tough weather.
Handling the panels is surprisingly simple. They’re thick and clear, letting in plenty of light but blocking harmful UV rays.
This balance helps keep the temperature inside stable, which is perfect for your plants, especially during colder months. The double-wall design also adds impact resistance, so you don’t have to worry about accidental bumps or storms.
The ventilation system is a nice touch. The adjustable roof vents and lockable door make it easy to control airflow, preventing overheating or excessive humidity.
There’s plenty of room inside to organize your plants, making it a joy to work in. Plus, the overall design feels spacious without being bulky.
All-season protection is really the highlight. Whether it’s heavy rain, snow, or wind, this greenhouse holds up well.
Its UV-resistant panels and heavy-duty frame give you peace of mind that your plants are protected year-round.
VEVOR Walk-in Greenhouse 55.5″x55.5″x78.7″ with Shelves

- ✓ Easy to assemble
- ✓ Durable, rust-proof frame
- ✓ Excellent light transmission
- ✕ Shelves could be sturdier
- ✕ Limited height for tall plants
| Frame Material | Heavy-duty rust-proof steel tubes, 0.02 inches thick |
| Cover Material | Waterproof PE tarp with level 6 UV protection |
| Shelves Capacity | Supports up to 33 lbs per shelf |
| Door Type | Roll-up zipper door for easy access and ventilation |
| Dimensions | 55.5 inches (width) x 55.5 inches (depth) x 78.7 inches (height) |
| Assembly | Tool-free, easy to connect rods according to user manual |
It’s a chilly spring morning, and I’ve just set up the VEVOR Walk-in Greenhouse in my backyard after work. The heavy-duty, rust-proof tubes felt solid in my hands, and I appreciated how lightweight yet sturdy they were.
As I started connecting the pieces, I noticed how straightforward the assembly was—no tools needed, just following the manual.
The transparent tarp immediately caught my eye. It’s waterproof with UV protection, so I didn’t worry about sunburn or rain.
I was able to see my seedlings clearly from outside, which saved me from constantly opening it up. The roll-up zipper door made it easy to step inside without fumbling with flaps or ties.
Inside, the shelves are a real game changer. They hold up to 33 lbs each, giving me ample space for pots, grow lights, and even some larger plants.
The design encourages airflow, which is crucial for healthy growth. I’ve already noticed my plants appear more vibrant, thanks to the balanced environment.
Transporting it between seasons was simple too. The lightweight frame and compact packing mean I can move it to my garage in winter or store it in the shed.
Overall, it feels like a reliable setup that’s built to last, while still being easy enough for a DIY enthusiast like me to handle without frustration.
Flower House Garden Playset with LED Light (597 Pieces)

- ✓ Realistic detailed design
- ✓ Bright LED lighting
- ✓ Fun and educational build
- ✕ Assembly can be time-consuming
- ✕ Small parts require careful handling
| Dimensions | 6.3 inches (16 cm) length, width, and height |
| Material | Transparent plastic components |
| Lighting | Built-in LED light with on/off feature |
| Number of Pieces | 597 pieces |
| Intended Use | Indoor decorative model and gift |
| Assembly Features | Openable roof, skylight, windows, doors, detachable roof |
Ever try building a tiny, detailed greenhouse that actually lights up and looks adorable? I was frustrated by kits that either felt flimsy or didn’t really bring the flowers to life.
This Flower House Garden Playset changed that instantly.
The moment I opened the box, I was impressed by how many pieces there were—597 in total, but surprisingly easy to sort through thanks to clear instructions. The transparent parts feel sturdy and give the whole structure a delicate, realistic look.
The roof is detachable, which makes it easy to place or adjust the interior, and the skylight adds a charming touch.
Putting it together took some patience, but the detailed design made it worth the effort. I loved the openable windows and doors—perfect for customizing or just admiring the inside.
Once everything was assembled, I turned on the LED lights, and wow, it transformed the tiny house into a cozy, vibrant centerpiece. The soft glow makes it perfect as a decorative piece or nightlight.
This set isn’t just fun to build, but it also feels special as a gift. It’s great for kids or adults who love gardening or miniatures.
Plus, it’s a charming addition to a bookshelf or table, adding a warm touch to any space. Honestly, the LED feature makes it stand out compared to other simple building kits.
Overall, this flower house hits the sweet spot between fun, beauty, and functionality. It’s a mini greenhouse that truly feels alive with light and detail, making your space feel more inviting.
WKM 8×16 ft Greenhouse with Roof Vent, Aluminum Frame
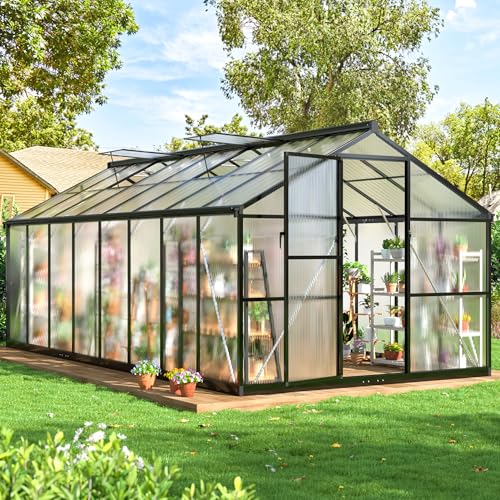
- ✓ Easy to assemble
- ✓ Strong, durable build
- ✓ Adjustable ventilation
- ✕ Slightly heavy to move
- ✕ Limited color options
| Frame Material | Reinforced aluminum alloy with UV-resistant polycarbonate panels |
| Dimensions | 190.1 inches L x 97.2 inches W x 80.7 inches H |
| Panel Coating | Anti-ultraviolet coating |
| Roof Vent Positions | 5 adjustable positions for airflow control |
| Structural Reinforcement | Reinforced sidewalls and base for wind and snow resistance |
| Installation System | Slide-in panel assembly for quick setup and sealing |
Stepping into the WKM 8×16 ft Greenhouse feels like entering a mini fortress for your plants. Unlike other setups I’ve handled, this one’s aluminum frame is noticeably sturdier, giving a real sense of durability right out of the box.
The slide-in panel system is a game-changer—it snaps together with minimal fuss and seals tight, saving a ton of time during assembly.
The design is quite clever, especially the adjustable roof vents. I loved how I could fine-tune airflow in five different positions—perfect for preventing overheating or ensuring fresh air on hot days.
Plus, the lockable door adds a layer of security, which is a nice touch if you’re worried about critters or curious kids.
Size-wise, it’s spacious but not overwhelming—just right to move around comfortably while tending to your plants. The panels are coated with UV protection, so your greens are shielded from harsh rays, yet still soak up the sunlight they need.
I tested it during a storm, and the reinforced structure held firm against wind and snow—definitely built for year-round use.
Installation was smooth thanks to the reinforced sidewalls and base, which you can bury for extra stability. I appreciated the detailed instructions and the customer service team’s quick responses, making the whole process feel less daunting.
Overall, this greenhouse offers a solid mix of durability, ease, and thoughtful features that really support healthy plant growth.
VEVOR Walk-in Greenhouse 55.5″x29.3″x80.7″ with Shelves

- ✓ Easy to assemble
- ✓ Durable, rust-proof frame
- ✓ Good light and air flow
- ✕ Limited height clearance
- ✕ Shelves may need reinforcement
| Frame Material | Heavy-duty rust-proof steel tubes, 0.02 inches thick |
| Cover Material | Waterproof PE tarp with UV protection level 6 |
| Shelves Capacity | Up to 33 lbs per shelf |
| Dimensions | 55.5 inches (width) x 29.3 inches (depth) x 80.7 inches (height) |
| Door Type | Roll-up zipper door for easy access and ventilation |
| Assembly | Tool-free, connects rods according to user manual |
Imagine waking up early on a bright weekend morning, eager to start your new gardening project. You step outside, and instead of wrestling with flimsy setups, you find yourself standing inside the VEVOR Walk-in Greenhouse.
Its sturdy frame immediately catches your eye, with thick, rust-proof tubes that feel solid in your hands.
The spacious interior—55.5 inches wide, nearly 81 inches tall—gives you plenty of room to move around. The shelves are a real game-changer, holding everything from pots to grow lights without feeling crowded.
Setting it up is surprisingly straightforward; just connect the rods according to the manual, and you’re good to go—no tools needed.
The waterproof PE tarp with UV protection keeps your plants safe from harsh sun and rain. Plus, the high light transmittance means your seedlings get plenty of light, without burning leaves.
The roll-up zipper door is handy, providing easy access and promoting excellent air circulation, which keeps everything fresh and healthy.
Whether in your backyard, patio, or even inside your garage, this greenhouse adapts easily. Its portable design means you can move it as seasons change, or if you want to rearrange your garden space.
Overall, it’s a reliable, well-thought-out setup that makes gardening simpler and more enjoyable, even for beginners.
What Are the Key Considerations for the Best Greenhouse Set Up?
The key considerations for the best greenhouse set up include location, structure, ventilation, temperature control, and watering systems.
- Location: Choosing the right location is crucial for maximum sunlight exposure and protection from harsh winds. A site that receives at least 6-8 hours of direct sunlight daily will help plants thrive, while being positioned away from large structures or trees that could cast shadows is also important.
- Structure: The structure of the greenhouse should be durable and suited for the local climate. Materials such as polycarbonate, glass, or polyethylene can be considered, with the choice depending on factors like insulation properties, light transmission, and cost-effectiveness.
- Ventilation: Proper ventilation is essential to manage humidity and temperature levels inside the greenhouse. Incorporating roof vents, side vents, and exhaust fans helps to ensure adequate airflow, which can prevent overheating and reduce the risk of diseases.
- Temperature Control: Maintaining optimal temperature ranges is vital for plant growth. This can be achieved through passive or active heating and cooling systems, such as heaters, shade cloths, or evaporative cooling systems, depending on seasonal variations and plant requirements.
- Watering Systems: An efficient watering system is necessary to provide consistent moisture without overwatering. Drip irrigation systems or automated timers can help in delivering water directly to the plant roots, conserving water and ensuring that plants receive the right amount of hydration.
How Do I Choose the Right Location for My Greenhouse?
Choosing the right location for your greenhouse is crucial for maximizing plant health and growth.
- Sunlight Exposure: Ensure your greenhouse receives ample sunlight, ideally 6-8 hours of direct sunlight daily. This is important as most plants require sufficient light for photosynthesis, which is vital for their growth and development.
- Wind Protection: Select a site that is sheltered from strong winds, which can damage the greenhouse and create unfavorable growing conditions. Natural barriers like trees or hills can provide protection, reducing temperature fluctuations and preventing excess moisture loss.
- Accessibility: Choose a location that is easily accessible for maintenance, watering, and harvesting. This facilitates regular care and ensures that you can quickly address any issues that arise, making your greenhouse more efficient and productive.
- Drainage: Ensure the site has good drainage to prevent water from pooling around the greenhouse. Poor drainage can lead to waterlogged soil, which can harm plant roots and promote fungal diseases, making it crucial to assess the land’s slope and soil composition.
- Proximity to Water Supply: Ideally, your greenhouse should be near a reliable water source for easy irrigation. Having a water supply nearby reduces the effort and time needed for watering plants, allowing for more consistent moisture levels, which is essential for healthy growth.
- Soil Quality: While the greenhouse itself may not directly rely on the surrounding soil, it’s beneficial to consider the soil quality if you plan to plant directly in the ground. Good soil can support healthy root systems and provide nutrients, so testing for pH and nutrient levels can be advantageous.
- Local Climate: Analyze your local climate conditions, including temperature fluctuations and humidity levels, to ensure that they are suitable for the plants you wish to grow. Understanding your climate helps in selecting appropriate greenhouse materials and designs that can maintain a stable environment for your plants.
What Role Does Sunlight Play in Greenhouse Placement?
- Orientation: The orientation of the greenhouse should maximize exposure to sunlight throughout the day.
- Location: Choosing a location that avoids shade from nearby structures or trees is essential for optimal light conditions.
- Glazing Material: The choice of glazing material affects light transmission and heat retention inside the greenhouse.
- Ventilation: Proper ventilation is necessary to balance light exposure and temperature control.
- Seasonal Adjustments: Seasonal changes may require adjustments in the greenhouse setup to maintain adequate sunlight exposure.
Orientation: The greenhouse should ideally be oriented north-south to maximize sunlight capture. This positioning allows for equal light distribution on both sides throughout the day, promoting uniform growth of plants.
Location: It’s important to select a location that receives ample sunlight and is free from obstructions such as trees or buildings. A site with good sunlight exposure can significantly enhance plant health and yield by providing the necessary light for photosynthesis.
Glazing Material: The glazing material, such as glass or polycarbonate, affects the amount of sunlight that penetrates the greenhouse. Clear materials allow for higher light transmission, which is crucial for plant growth, while also providing insulation to maintain temperature.
Ventilation: Adequate ventilation helps to regulate temperature and humidity, which can be impacted by sunlight exposure. By ensuring proper airflow, you can prevent overheating and create a conducive environment for plant growth even on sunny days.
Seasonal Adjustments: As seasons change, the angle of the sun shifts, affecting the light that enters the greenhouse. Adjusting the setup, such as using shades or movable structures, can help maintain optimal light conditions throughout the year.
Which Greenhouse Design is Most Suitable for My Needs?
The best greenhouse setup for your needs will depend on various factors including climate, space, and the types of plants you wish to grow.
- Lean-to Greenhouse: This design is attached to an existing structure, such as a house or garage, providing warmth from the adjacent building.
- Freestanding Greenhouse: A standalone structure that can be placed anywhere in your yard, offering flexibility in placement and design.
- Dome Greenhouse: A geodesic dome shape that maximizes light exposure and creates a stable interior climate, ideal for various plant types.
- Hoop House: A simple, tunnel-like structure made from plastic or fabric over metal hoops, offering an affordable and easily constructed option for season extension.
- Cold Frame: A small, simple design that acts as a mini-greenhouse, perfect for starting seedlings or protecting plants from frost.
Lean-to Greenhouse: This type is beneficial for those who want to save space and potentially reduce heating costs, as it utilizes the existing wall of a building for insulation. It’s typically easier to access water and electricity from the main structure, making it practical for smaller yards.
Freestanding Greenhouse: Ideal for larger properties, this design allows for maximum sunlight exposure and can be oriented to take advantage of prevailing winds. It offers more space for growing a variety of plants and can be designed with specific features like ventilation and shelving to accommodate different gardening needs.
Dome Greenhouse: The unique shape of a dome greenhouse promotes excellent air circulation and even temperature distribution, making it suitable for both hardy and tender plants. Additionally, its design can withstand heavy snow loads and strong winds, providing durability in various climates.
Hoop House: This low-cost option is constructed from readily available materials, making it accessible for many gardeners. Hoop houses are particularly effective for extending the growing season, allowing for earlier planting in spring and longer harvesting in fall.
Cold Frame: A cold frame is a practical choice for those with limited space or who want to start seedlings indoors before transplanting them outside. It helps in regulating temperature and protecting delicate plants from frost while still allowing for natural sunlight exposure.
How Can I Optimize Airflow and Temperature Control in My Greenhouse?
To optimize airflow and temperature control in your greenhouse, consider the following best practices:
- Ventilation: Proper ventilation is crucial for maintaining optimal temperatures and humidity levels. Incorporating roof vents and side vents allows hot air to escape while fresh air enters, helping to regulate temperature and prevent overheating.
- Fans: Using exhaust and circulation fans can significantly enhance airflow within the greenhouse. Exhaust fans help remove hot air, while circulation fans distribute air evenly, preventing hot spots and ensuring that plants receive consistent temperature and humidity.
- Shade Cloth: Implementing shade cloth can protect your plants from excessive sunlight and heat. By blocking a percentage of sunlight, shade cloth helps maintain cooler temperatures inside the greenhouse, reducing the risk of heat stress on plants.
- Thermal Mass: Utilizing thermal mass, such as water barrels or stone, can help stabilize temperature fluctuations. These materials absorb heat during the day and release it at night, creating a more consistent environment for plant growth.
- Temperature Monitoring: Installing a temperature monitoring system allows you to keep track of conditions within the greenhouse. This data helps you make informed decisions about when to ventilate or shade your greenhouse, ensuring optimal conditions for plant health.
- Insulation: Proper insulation can help retain heat during colder months and maintain cooler temperatures in summer. Insulating materials, such as double-walled polycarbonate panels, can create a more energy-efficient greenhouse environment.
- Automated Systems: Consider implementing automated ventilation and shading systems. These systems can adjust based on temperature readings, ensuring that your greenhouse maintains ideal conditions without constant manual intervention.
What Essential Features Should I Include in My Greenhouse Set Up?
When planning the best greenhouse setup, several essential features should be considered to ensure optimal plant growth and maintenance.
- Ventilation: Proper ventilation is crucial for regulating temperature and humidity levels within the greenhouse. Using roof vents, side vents, or exhaust fans helps to prevent overheating and reduces the risk of mold and disease.
- Heating System: A consistent heating system is necessary for maintaining an ideal environment, especially during colder months. Options include electric heaters, propane heaters, or even passive solar heating techniques to keep temperatures stable and suitable for plant growth.
- Lighting: Adequate lighting is vital for photosynthesis, especially in areas with limited natural light. Supplementing sunlight with grow lights, such as LED or fluorescent bulbs, can help extend the growing season and enhance plant health.
- Watering System: An efficient watering system ensures that plants receive the right amount of moisture. Drip irrigation systems or automatic timers can help manage watering schedules and conserve water while preventing overwatering.
- Thermal Mass: Incorporating thermal mass materials, such as stones or water barrels, can help stabilize temperature fluctuations. These materials absorb heat during the day and release it at night, creating a more consistent environment for the plants.
- Plant Spacing and Layout: Planning the layout and spacing of plants is essential for maximizing growth and ensuring adequate air circulation. Utilizing raised beds or shelving can optimize space and improve access for maintenance and harvesting.
- Environmental Controls: Implementing environmental controls, such as thermostats and hygrometers, allows for precise monitoring of temperature and humidity levels. Automated systems can adjust conditions as needed, thereby creating a more stable greenhouse environment.
- Flooring and Drainage: Choosing the right flooring material and ensuring proper drainage is important for preventing water accumulation and promoting plant health. Gravel, concrete, or permeable pavers can provide good drainage while making maintenance easier.
How Can I Ensure Efficient Use of Space Within My Greenhouse?
To ensure efficient use of space within your greenhouse, consider the following strategies:
- Vertical Gardening: Implementing vertical gardening techniques allows for maximizing space by growing plants upwards rather than outwards. This can be achieved with trellises, shelves, or hanging pots, enabling you to cultivate more varieties while maintaining easy access to all plants.
- Companion Planting: Utilizing companion planting helps in optimizing space by pairing plants that benefit each other, thereby enhancing growth and maximizing the use of your greenhouse. For example, planting tomatoes alongside basil can improve yields while conserving space.
- Container Gardening: Using containers can provide flexibility in arranging plants within the greenhouse. Different sizes and shapes of pots can be moved around easily, allowing for adjustments based on light availability and plant growth stages.
- Efficient Layout Design: Planning the layout of your greenhouse is crucial for space efficiency. Ensure that pathways are designed for easy movement and that plants are organized based on their light and water needs to minimize wasted space and resources.
- Tiered Shelving: Installing tiered shelving units can help utilize vertical space effectively, especially for smaller plants and seedlings. This arrangement allows for better light distribution and air circulation while keeping the greenhouse organized.
- Crop Rotation: Practicing crop rotation not only maintains soil health but also allows for a more efficient use of space over time. By changing the location of crops each season, you can prevent overcrowding and ensure that space is used optimally for different plant types.
What Maintenance Practices Will Keep My Greenhouse Healthy and Productive?
Maintaining a greenhouse effectively involves several key practices to ensure a healthy and productive environment for plants.
- Regular Cleaning: Keeping the greenhouse clean is essential to prevent diseases and pests. This includes washing the glass or plastic panels to maximize light penetration and removing debris that can harbor pathogens.
- Temperature Control: Maintaining optimal temperatures is crucial for plant growth. This may involve using fans, heaters, or shade cloths to regulate heat, ensuring that plants thrive in both warmer and cooler months.
- Humidity Management: Proper humidity levels help prevent mold and promote healthy plant growth. Utilizing dehumidifiers or ventilation systems can help manage moisture levels, while also ensuring that plants receive adequate air circulation.
- Soil Management: The quality of soil in your greenhouse directly affects plant health. Regularly testing and amending soil with organic matter or fertilizers can improve nutrient availability and promote microbial activity, which is essential for plant growth.
- Pest and Disease Monitoring: Regularly inspecting plants for signs of pests or diseases allows for early intervention. Implementing integrated pest management practices, such as introducing beneficial insects or using organic pesticides, can help keep your greenhouse ecosystem balanced.
- Watering Practices: Proper watering techniques, such as drip irrigation or using moisture sensors, ensure that plants receive the right amount of water without over-saturating the soil. This promotes healthy root development and minimizes the risk of root rot.
- Crop Rotation: Rotating crops within the greenhouse can help prevent soil depletion and reduce the buildup of pests and diseases. This practice encourages biodiversity and can improve overall soil health.
- Plant Selection: Choosing the right plants for your specific greenhouse conditions can lead to better productivity. Selecting varieties that are suited to your climate, available light, and humidity levels can enhance growth and yield.
- Regular Maintenance of Structures: Inspecting and maintaining the physical structure of the greenhouse, including checking for leaks, ensuring proper ventilation, and repairing any damage, is vital for a stable growing environment.